





The 2019 Fraemohs report on effective budget management when building
Contents
Introduction
Step 1: Get professional financial advice Step 2: Choose your section carefully Step 3: Do some research first Step 4: Plan your design Step 5: Cost your design Step 6: Get a professional valuation Step 7: Allow for contingencies Step 8: Weigh up the pros and cons of doing work yourself Step 9: Track your progress Step 10: Spend on the essentials first not the luxuries ConclusionIntroduction
One of the main concerns for most people when considering building a new home is managing the budget.
Often people have heard horror stories about others running out of money halfway through a build and being left with an incomplete house.
The good news is that there are things that you can do at each stage of your build project to minimise the risk of a budget blowout. In this paper, we have compiled some practical steps you can take to effectively manage your budget when building. This is based on our industry experience, and what we’ve observed from previous clients who have been excellent in this area.
Some of these steps may not apply to you (eg, if you already own land), but once adjusted to suit your specific circumstances, this will provide a great framework for budget planning and cost control on your project.
Step 1:
Get professional financial advice
Saving potential:


In order to set a budget, you need to know how much you can afford. Often his will mean contacting your bank or mortgage broker to find out how much you can borrow and what the repayments will be.
One tip is take note of the broker’s relationship to lenders. If, for example, they’re a partner or closely affiliated with just one lender it probably means they’re going to recommend that lender’s products. Keep in mind that the big banks aren’t always the best option. Some smaller New Zealand-owned lenders also provide competitive rates and the profits theoretically remain in New Zealand instead of going to Australia.
It is sensible to approach at least 2 or 3 brokers so that you can find one who will best meet your needs. Weigh up what they have to offer and which lenders they deal with. Be sure to ask serious questions about their ongoing service as you want someone who’s going to look out for you in the long-term, respond promptly to calls and emails and help you secure the best deal. Keep in mind that personnel within brokerages change, so you want confidence in the firm’s values, that should your initial contact leave, she / he will be replaced by someone equally proficient. Remember that this is not a one-off transaction – you are likely to have a mortgage, and require an effective mortgage broker for some years ahead!
If this is your first home, you may be eligible for a Kiwisaver Homestart grant of up to $20,000 per couple. However, you will need to meet certain conditions, including having contributed to Kiwisaver for at least three years. So ensure that you check that you meet the criteria well in advance of when you need the funds. Maximum household income levels apply and you must intend to live in the house for at least 6 months following completion of the build. The grants are administered by Housing New Zealand and will be paid to your solicitor.
Step 2:
Choose your section carefully
Saving potential:


Where you choose to build your home will have a huge bearing on the cost of your build.
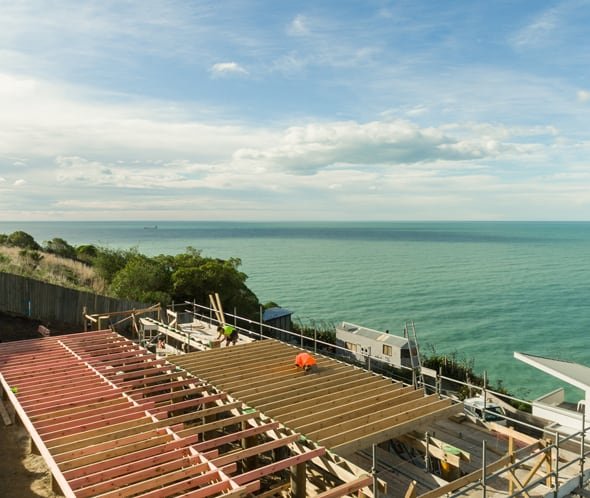
Building on a hillside will cost significantly more than building on a level section as you need to factor in the cost of retaining walls and specially engineered foundations. Good design is the key to minimising extra costs. By designing your home to work in with the existing contours of the site as far as possible, you can reduce the costs associated with excavation and retaining walls.
A common solution to building on a slope where the access is from the bottom of the section is to build the garage under the house at basement level. Where the access is at the top of the section, it makes sense to have the garage at street level and have the home flow down the slope.
If you are looking at building in an isolated area, make sure you find out whether the site has access to basic services such as sewage and power because having to install connections to these networks can come with a hefty price tag.
Keep in mind that it may also be difficult and more costly to get tradespeople and materials to your building site if it is in a remote spot.
While a section in a new subdivision is likely to have services in place, there may be specific covenants or requirements in terms of the size or style of home, landscaping or fencing that you are allowed to have.
Some subdivisions provide site-specific geotechnical reports but otherwise you will need to get one done. Your chosen building partner should be able to recommend some professional firms that carry out this work.
In most cases, a geotechnical report will identify potential problems with the land such as a hidden spring. However, occasionally such problems may not be discovered until work commences on site. So while an estimated cost will be allowed for excavation and fill for foundations, the engineer may find that additional excavation or fill is required once work is underway. In which case there will be a variation to the contract to cover the additional costs associated with this.

Step 3:
Do some research first
Saving potential:


Before you commit to building a home, it is valuable to do some background research. Many people begin the build process with little experience of the costs involved in building and consequently have no idea what a realistic budget might be.
Have a look at some real estate websites as this will give you an indication of the sale price for completed new homes in your area, which can be a good starting point.
There are plenty of house plans available online to use as a starting point to get you thinking about what kind of home would meet your needs.
You may like to draw a rough sketch or make a list of the features that are important to you. It can be useful to separate your wishlist into “must have” and “nice to have” to help you when it comes to prioritising if you need to scale things back to fit your budget.
Once you have done some thinking about what you want in your new home, have an initial consultation with your preferred building company to discuss your ideas and your budget. Some building companies have in-house architectural designers who can turn your ideas into a realistic plan tailored to your section and your budget.
Step 4:
Plan your design
Saving potential:


The section you choose will also affect your design budget for your home. If you have a straightforward building site and are wanting a reasonably standard type home, then you may be able to find an existing home plan that your building company is able to modify slightly for you.
Some building companies have the ability to create a custom plan based on your sketch, or list of ideas and also prepare accurate costings based on this plan. You should allow approximately 3 or 4 weeks for this process.
If you have a challenging site or are wanting to engage an architect to come up with a statement home, you will need to allow significantly more in your budget for both your plans and your new home build.
Whoever you engage to draw up your plan will need to ensure the design meets any specific covenants on your section, and the local Council requirements. They also need to have an understanding of current building costs, or they may end up adding features to your home that push you over budget..

Step 5:
Cost your design
Saving potential:


It’s certainly recommended you seek out a building company prepared to supply you with a detailed costing along with your home plans.
If you get your plans drawn up by an architect, then you may wish to employ a quantity surveyor to cost your build. Or alternatively take your plans to your chosen builder to price.
The most important thing at this point is to make sure that you get a detailed price which spells out exactly what is included and what is not. Take the price away and look over it carefully and make notes of anything you are not sure about. Be prepared to ask lots of questions at this point. For example, does the quote include hardware such as door handles and fixtures like towel rails? Do you have a choice of bathroom fittings or window styles? Will you need to pay extra for certain materials if the price goes up in the meantime?
Any hint of vagueness in a quote should raise red flags as you could well find yourself being charged for all sorts of “extras” that you had assumed were part of the contract.
It is important to know exactly which products are included in the specifications and avoid anything that says “builder’s selection” to ensure that you don’t have any nasty surprises in terms of inferior quality fittings or fixtures.
Decide which design elements you are prepared to compromise on and which you are not.
Step 6:
Get a professional valuation
Saving potential:


Once you have decided on your design, you will need to get a valuer to estimate the value of your home once it is complete. The valuation will be required by your lender before they agree to finance your build and it needs to show that the finished home will be worth as much – or more – than what you are planning to spend on building it. The lender wants to see this in case the mortgage fails and they need to sell the property to recoup their money.
Some important things to consider to maximise your potential resale value are ensuring that the home you design is in keeping with the type and value of homes in the area in which you are building. For example, while you might not think you need to build a garage, the absence of a garage may reduce the appeal of your home for many buyers. Similarly, while you may only need two bedrooms at this stage, think about whether your needs may change in the future and what the average buyer would expect (‘future proofing’).
Step 7:
Allow for contingencies
Saving potential:


If you are renting while you build or are servicing two mortgages, make sure you have some money set aside in your budget to cover contingencies. Be realistic about timeframes. While in a perfect world it may be possible to build a home in 5 months, recognise that delays can happen for a variety of reasons, such as bad weather, or unforeseen delays in sourcing products from suppliers.
If your project is delayed significantly for any reason before the build commences, you might need to get the property revalued in order to get your financing. This is in case the property value has fluctuated during that time. Similarly, labour and materials prices change over time so you may discover that the initial price quoted to you by your building company is no longer valid if more than a few months have passed by.
Step 8:
Weigh up the pros and cons of doing work yourself
Saving potential:


Some people attempt to trim back their build budget by sourcing products or taking on some of the work themselves, or employing contractors they know. While some building companies are happy for clients to take responsibility for parts of the build or for sourcing particular products that appeal to them, other building companies may not be as flexible.
If you are an experienced tiler yourself, of course it makes sense that you would want to do the tiling in your own home. Similarly if you have a family member who is a qualified electrician, you may prefer that they do the wiring on your project. However, if you are engaging family members or friends to work on your project, make sure that they are appropriately skilled to do the work required and will be available when needed.
In our experience sometimes clients have been disappointed to discover that products they have ordered from overseas themselves have not been compliant with New Zealand standards or have not arrived when expected, resulting in delays to their build.
Be realistic about your own abilities and how much time you have available to work on your project. Tasks such as plastering and painting are best left to professionals if you want to ensure that your home has a high standard of finish.
If you have the skills and the time, doing some of the work yourself can be a good way to help your budget stretch that bit further. For example, assembling a kitset home saves a tremendous amount of outlay on labour. In other cases, many of our clients have opted to build decks and entranceways as this did not affect the progress of the project and could be done after they had moved into the home, adding further value to their property.
Step 9:
Track your progress
Saving potential:


As work progresses on your build, make sure you keep track of any variations to your initial budget.
Where the change works in your favour and materials or labour costs less than budgeted for this may give you more flexibility to upgrade fixtures or fittings elsewhere. If the opposite is the case, you may need to review where you can make savings. If your budget is tight, you may be able to defer spending on some areas that are not essential to the home’s completion, such as curtains and landscaping and get these done as and when you can afford to.
Step 10:
Spend on the essentials first not the luxuries
Saving potential:


Some people get very excited by the idea of having a brand new home and go out shopping for a whole load of brand new furniture to go in their new house. If you have funds left over for a new lounge suite once your build is complete, all well and good. However it is much more sensible to make sure that you have the funds you need to complete your new home build first. Remember that you will not be able to get home insurance until your house has received a code of compliance from your local authority. And you will not get a code of compliance unless the house is finished to an appropriate standard.
Conclusion
With careful planning and appropriate professional advice, you should be able to manage your build budget effectively. The key tips to remember are to be realistic about your budget, be clear about what is included in your build contract and what is not. And have some funds in reserve to cover unforeseen delays or expenses.


